Late Summer Salad

I may have been 20 when I finally decided vegetables were at least worth another try.  Growing up I had been forced by my parents to choke down a teaspoon of vegetables  at mealtime whether I liked it or not.  I made sure my  dislike of vegetables was loudly broadcast at each meal.  I tried to find clever ways to make them disappear from my plate by any route other than chewing and swallowing.  Potato skins and chicken bones were good hiding places but only if they happened to be available.  That good fortune wasn’t always the case.  Every so often our dog would be allowed in at dinnertime and he was only too eager to save the day from his convenient spot under the table!!!

Hiding the loathsome veggies in my cheeks and donating them to the trash can after dinner was good too, but only if I didn’t get caught.  I’ve seen my granddaughter Bridget (my mini me) doing the same thing and of course I let her get away with it!  That’s part of my Mimi prerogative.

Of course, in all fairness to me, you couldn’t pay me to eat mushy vegetables today, never mind when I was a kid.  My mother cooked to please my fathers taste and he LOVED mushy vegetables.  The epitome of gross in my opinion.    I get why my mother did it…but honestly…gross.

Now, in my own kitchen I get to cook them any way I please.  Fortunately my husband and I like vegetables as close to their natural state as possible.  Cooked al dente and recognizable.  My mother likes them this way also and I recently asked her why… in all the years of my childhood,  she cooked everything, especially vegetables, to death?  (This IS one of my childhood recollections that I’m sure left scars I will never recover from!!!  We have a family joke about pork “chips”…but I digress…)   She replied…”that’s how your father liked everything”.  Yes indeed.  That is so.

My father loved to read and collect recipes.  If he saw one he liked he would cut it out and save it.  He cut and saved hundreds…and I mean hundreds… over the years of his life.  I am certain he hoped my mother or I, or one of my sisters would make them all and he would have been the taste tester.  I wish he was here now to try some of the ones I’ve been creating.  This al dente late summer salad is one I am sure he would like.  I would make him try only a teaspoon !!!  I know he would go back for more…

Here’s to you Papa.  oxoxo

LATE SUMMER SALAD

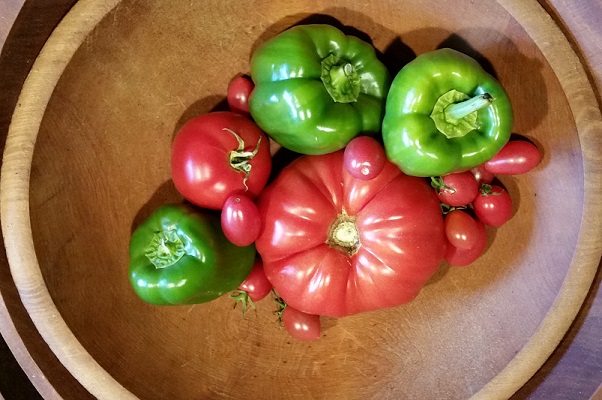
Basically this recipe is put together with the few remaining pole or bush beans still clinging to the vines , green, purple, yellow.  The more color the merrier.  A few cherry tomato’s, an over large cucumber (seeds removed) or a couple of small ones.  Some basil that hasn’t been blackened by cool nights and the parsley that takes off in this cooler weather.  If there is any dill left add some of that too.  Chives are a must and they, as well as parsley will continue to produce until hard frost.

There are no exact measures here…I literally toss the vegetables and herbs together and add fig infused white balsamic vinegar, extra virgin olive oil and salt and pepper to taste.

Rinse all of your vegetables and herbs well.  Snap the stem ends from your beans and steam them until al dente.  When they are steamed to your liking, rinse them under cold water.  Slice them into roughly 2″ lengths.  Place them in a bowl and add your peeled, sliced or diced cucumber.  If you have an extra large cucumber, seed it.

Next add quartered cherry tomato’s.  If you are using bigger tomato’s, dice them into any size chunks you like.  There is no right or wrong here.

I have at times added diced carrots, beets, baby zucchini, anything goes.  Let your imagination create a salad to your liking.

Now, toss the veggies together a bit.  Add freshly ground salt and pepper to taste.  Drizzle extra virgin olive oil over the veggie mixture and do the same with the fig infused white balsamic vinegar (I use Alessi which can be found in most markets in the oil and vinegar aisle).  If you don’t have or can’t find the fig infused then use regular white balsamic vinegar.

Now rough chop your herbs.  Fresh basil, parsley, dill and chives.  No precision needed…a rough chop is fine.  After mixing them into the vegetables in the bowl add crumbled feta cheese.  Or, I’ve added diced fresh mozzarella or sharp cheddar at times and it is just as delicious.  Even grated Parmesan works well.  Do what will please your palate…

Let this splendid mixture of vegetables, herbs, oil and vinegar sit on the counter for an hour or two before serving.  Give it all an extra toss just before serving.  I promise you…if all you have is a handful of beans and a cucumber left in your garden…this will give them center stage on your table one more time when everything else in your garden has gone by.  Summer is fading…but it isn’t gone YET.

Many Blessings…


Hazelnut Shortbread Cookies


Its enjoyable to have the oven going again after giving it a rest through the summer months.  This time of year the mornings are chilly here on our hill in the woods.  If I’m going to be home all day I get the oven going early and bake.  It warms the house until the sun rays stream in through the windows and then it can get so warm inside I have to open the windows.  I love this time of year.  Its the best of everything.  I guess we each have a season we love more than the others.  This is mine.

The vegetable garden is still producing, at a much slower pace,  expending what is left of its energy to keep giving.  Without fail, this always makes me a bit sad.  Like having to say goodbye to summer friends.  And so it goes…

I bought some Cortland apples today and my mom will make a crisp for this coming weekend.  Cortlands, Romes, Ida Reds, all make delicious baked goodies.  A lot of folks prefer Granny Smiths for pies.  I always use Cortlands or Romes.  A matter of preference.  There is no right or wrong here.

Hazelnut, or almond shortbread cookies are one of the first signs in my kitchen that I’ve surrendered summer to autumns arrival and out come my leaf cookie cutters.  They do double duty until Thanksgiving when I use them to decorate pies by rolling out leftover crust and placing them on top of the top pie crust.  A bit of  extra decoration for the season.

These shortbread cookies are spectacularly nutty and rich.  The butter is a key ingredient.  You MUST use butter.  Nothing else will do.

Finely ground hazelnuts, pecans, walnuts, almonds.  Any of these make these cookies divine.  But…don’t mix the nuts.  Use only one kind of nut in each batch.  I tried mixing them once and all I’m going to say is…I won’t make that mistake again.  The true flavor of each nut gets lost if they are forced to crowd together.  They like to shine individually…as well they should !!!

If I use almonds, walnuts or pecans I always add pure vanilla extract.  With the almonds I add pure almond extract as well but be careful…a little of that goes a long way.  If you do use pure almond extract a 1/2 teaspoon is plenty per single recipe.  This recipe doubles beautifully and I always double it.  I want extras to stash so when I’m reading in bed at night I can savor a few !!!

These cookies have a handful of ingredients and once mixed need to sit in the refrigerator overnight.  So, make them a day ahead when you know you will have time in the next day or so to bake them.

HAZELNUT SHORTBREAD COOKIES

To a mixing bowl add:  (and feel free to double this…it works well)

1 cup (two sticks) of BUTTER softened to room temperature

1/2 cup and 2 TB FIRMLY packed light brown sugar

1 TB corn starch

1/4 teas salt

2 cups all purpose unbleached flour

1 cup of finely ground hazelnuts, almonds, walnuts or pecans (I use Bobs Red Mill Hazelnut Meal Flour or Trader Joe’s Almond Meal) Otherwise I finely grind the nuts in my processor.  Be careful to stop grinding before you have nut butter!!!

1 to 2 teas of pure vanilla extract and if you are using pure almond extract use a 1/2 teas

Mix all ingredients together until they are well blended and a ball of dough forms.  Remove the dough ball from the mixer and place in a covered bowl in the refrigerator overnight or for at least 8 hours.  Preferably overnight.

After the dough has chilled remove it from the refrigerator and let it soften a bit.  It is easier to handle.

Pre heat your oven to 300 degrees

Remove the dough from the bowl and using a sharp knife or your dough scraper slice it into 3 or 4 thick slices.  Place one slice at a time on a rolling surface.  Using a rolling pin (and a dusting of flour as needed) roll the dough until it is 1/4 inch thick.  Using any type of cookie cutters, cut your cookies and place on a parchment lined baking sheet.  These cookies can be placed close together (not touching tho) on the cookie sheet.

Bake one sheet at a time in your 300 degree oven for 20 to 25 minutes until the bottom of the cookies turn  medium brown in color.  Resist lifting a cookie to check how browned they are…they will crumble.  You will be able to tell they are browning by looking at them.

Remove the baking sheet from the oven and let the cookies cool for three minutes before moving them to a cooling rack.  Let them cool completely before storing in an airtight container.

Repeat this process until you have used up all the dough.  A single recipe makes (depending on the size of your cookie cutters) about 24 to 30 irresistible cookies.

A dear friend of mine once commented that these cookies looked “boring” .  So, as she had a good point, every so often I drizzle melted dark chocolate on top of them after they have cooled.  Let the chocolate dry before stacking them for storage.  At the holidays, I also dress them up with red, green or white sprinkles.  Do it your way.  No matter how they look, their flavor is anything but boring and always wins the hearts of everyone who tries them.

The house smells like cookie heaven and before you share these with anyone else you really should try one or two…or four or six…after all, you wouldn’t want to miss out on them.  Cuz once you put them out to share they will disappear!  Or, you can always hide a few like I do !!!

Happy Friday!  And as always, MANY BLESSINGS…


Roasted Butternut, Sage and Garlic Lasagna

Greetings on this glorious September day.

Fall is definitely approaching and I hope it lingers this year.  After what seemed a short, rainy and chillier than usual summer it would be a welcome treat to have the kind of autumn that meanders along lazily, taking its sweet time,  giving us opportunities to slow down and kick our feet through the fallen leaves.  A real New England Indian Summer.

Our peach trees were loaded this season.  Mom and I made three batches of Paradise Jam.  (wait for the recipe…it will come!)  I froze quite a few pies worth of peaches so I know in the depths of the coming winter I will be pulling the filling out of the freezer and warming the house with baking peach pies.

Today tho, I’m roasting butternut squash with butter, extra virgin olive oil, sage and thyme sprigs, sweet sliced Vidalia onion and roasted garlic.  I’m not sure what about this I enjoy most.  The unbelievable smell in the house as these ingredients roast or the taste of this dish after its been baked and waits on the table.

This lasagna is terrific for a large gathering and inevitably I am requested by my family to make it at the holidays and throughout the winter months.   Its not difficult to put together.  The roasting takes the most time.  On a cool fall day the roasting not only warms the house but it forces you to slow down.  Having to wait for the process to complete gives you an opportunity to catch up on something else around the house.  Or not.  You can just sit and smell the aroma coming from the kitchen.  That in itself is enough for me!

One of the nice things about this recipe is you can roast the butternut mixture ahead of time and refrigerate  it until you are ready to put the lasagna together.  As with some dishes, the flavors blend if they are allowed to sit a bit and sometimes the dish is much more flavorful the next day.

Roasted Butternut, Sage and Garlic Lasagna

Pre heat your oven to 375 degrees.

Get your large shallow roasting pan out and ready to receive:

One  large butternut squash peeled with seeds removed and stem ends cut off.  (I have a favorite vegetable peeler which makes peeling the squash super easy…see photo)   Once prepped, dice the butternut into 1/2 inch chunks and place in your  shallow roasting pan.

One large Vidalia onion, skinned and sliced.  Spread onion slices over the squash in the roasting pan.

Four or five sprigs of fresh sage and two or three sprigs of fresh thyme.  Rinse these and lay them over the squash and onion.

Drizzle the mix with 2 or 3 TB of extra virgin olive oil.   Dice about 3 TB of butter and place on top of the squash and onions.

Add a few grinds of salt and pepper (to taste)

Now add about 3/4 cup of water to the pan.

Gently mix the contents in the roasting pan, then place the pan in the pre heated oven and roast the squash mixture (uncovered) for about an hour and a half.  Every 20 minutes, give or take,  pull the pan out of the oven and stir the mixture around a bit.

When the squash is fork tender and the moisture in the pan has evaporated its time to take the pan out of the oven.  Let the squash mixture cool completely in the pan.    Once it is completely cooled, pull out and discard the sage and thyme sprigs.

Now, I take advantage of the oven going and roast a large bulb of garlic at the same I’m roasting the squash mix.    To do that (if you’ve never roasted garlic) is easy.

Take one large bulb of garlic.  Gently, with your fingers and without separating the cloves, peel most of the paper off the garlic bulb.  With a very sharp knife slice the top of the bulb off.  Some of the tiny tips of the cloves may separate at this point.  No worries…just keep them all together in a pile with the rest of the bulb.  Now, place the bottom of the bulb in a small ceramic roasting dish.  Drizzle about 2 TB of olive oil over it.   Then place the top of the bulb back on the bottom half and drop those loose tips alongside.  Drizzle again with another TB or so of olive oil.  The only thing you can do wrong here is  not add enough olive oil.  I add a TB or two of water as well.  Now, cover the dish tightly with foil and place it in the oven alongside the roasting pan of squash.

Roast the garlic for about 45 minutes (if the bulb is a smaller one roast for 30 minutes).  Take the dish out of the oven and let it cool completely.  Do not remove the foil covering.   Yet.

Now to make the cheese sauce for the lasagna.

Melt a stick of butter in a sauce pan over medium to low heat.  When it is completely melted (do not let it burn which it will do quickly if you are not watching it)  add 2 TB flour.  With a whisk, quickly blend the flour into the butter and gradually add 2 cups of half and half while continuing to whisk.  The whisking will avoid lumping.  Now, when you have a semi thick, smooth mixture of butter, flour and half and half add:  3/4 cup of grated Parmesan cheese, 1/2 cup of grated Asiago or whatever type of sharp Italian cheeses you prefer.  Whisk the cheese in well until you have a gorgeous thick, creamy, fabulous smelling cheese sauce.  Lastly add the cooled roasted garlic by squeezing the cooled cloves out of their paper skins.  Blend it in well with the cheese sauce so that some of the cloves smush.  Remove from heat.

When these steps are complete, get your lasagna pan or ceramic dish out and ready to receive.  Pre heat your oven to 350 degrees.

Drizzle a bit of olive oil over the bottom of the dish or pan you are using.  Alternately layer lasagna pasta, squash mixture and cheese sauce ending with the cheese sauce.  Sometimes I add a layer or two of ricotta.  I have added chicken or sausage to this dish, but I personally think its better without meat.  You really get the squash and cheese flavors.   When you have poured the last of the cheese sauce over the lasagna top it off with a bit more grated cheese of your choice or slices of fresh mozzarella.

Bake in a 350 degree oven for roughly an hour.  Give or take depending on when you see that telltale cheesy bubbling in the center of the dish and the smell in the house is making the wait for this delectable masterpiece impossible to endure.

At that point, take the lasagna out of the oven.  Set it on your  table and while your friends and family are gathering around it will have a chance to rest and set.  Get out your biggest serving spatula, load up the plates and dig in.  Enjoy every last plate scraped bite.

I typically add a red cabbage slaw and or green beans to this meal.  Add a salad if you wish.  Anything goes.  Don’t forget to pour the wine.

Many Blessings…


Recipe for today… Share and be grateful for the MANY BLESSINGS

Keeping sight on out of control wildfires and hurricanes and the tragedy of immense loss these bring not only in material things but of precious lives across our country I feel a bit of angst and guilt for the many blessings I have in my life.   I try not to take my good fortune for granted yet I lower myself into the rut of doing  so more than I like to admit.  Its easy to feel that life is unfair.  We have so much and yet we want more.

I was raised by parents who grew up during the depression years.  Frugality was a necessity then and from the stamp that era of struggle left on my parent’s my childhood was filled with hand me downs, leftovers, fixing what was broken (very little ended up on the landfill) and growing and freezing or canning vegetables and fruit from our garden.  The laundry was hung on the line outside without fail…on the porch under the overhang on rainy days… or on wooden drying racks inside on the coldest winter days.

We didn’t freeze, tho on bitter cold days the thermostat didn’t get tweaked, we put on sweaters.  My two sisters and I hung out in the kitchen where the oven was baking a cake or an apple crisp and warmed our bodies and souls there. We played cards or fought and drove my mother to crazy distraction.

Summer days we played outside…we did not sit in air conditioned cinemas or cruise the mall.  Mall???  What mall???  I age myself here…The windows were open all summer with those horizontal  sliding screens that smelled like hot burning metal and occasionally a fan would appear to ease the stifling hot air in the house.  My sisters and I were taught the valuable lesson of not sticking our fingers in the moving fan. We were responsible for not doing it.  We listened.   That one fan was moved from room to room as we moved.  It hummed like a hovering helicopter in the distance.  Huh…writing this I suddenly have so many memories flooding in…

Just about everyone wanted more.  Wished for more.  Yet we were so much better of than many.  Little did we know how blessed we were.  We were not poor by any means.

I remember one Christmas in particular…I was nine tender, impressionable years old.  Earlier that year my older sister was given a usable, beat up bicycle…(which she further beat up and worked to its death not long after and I do believe it ended up in the landfill !! )  My father repainted it gold (I’m sure from a can of leftover paint in the basement…).  I wanted my own bicycle in the worst way.  So, for Christmas that year I asked Santa to bring me one.  A blue one.  With tassels on the handles.  And a bell ringer.  And a basket.  I didn’t want much.

Christmas morning I woke to find that splendid blue bicycle standing in front of the tree…a glorious dream come true.  I didn’t pay any attention to the dented bumper, the pre-used basket on the handlebars or the seat with a tear on one side.  What crushed me beyond words was the tag hanging on the bicycle.  On it was written in Santa’s special handwriting… To Greta, Sara and Heidi…Merry Christmas.  My eyes bulged with disbelief.  My heart resembled the one in the Grinch before it grew to feel the love.

WHAT?   NO!  It can’t be.  That Christmas I learned a few things.  To my nine year old (middle child) mind life was totally unfair.  Sharing was the absolute middle child syndrome torture and Santa was an insensitive fat man who wasn’t getting any more Christmas cookies from me.

Fast forward…many years.  I have children of my own.  Money is tight but we are not suffering.  I know about Santa and that sometimes even he can’t rely on the elves to come through with the goods.  My husband and I have three boys and each want something on wheels for Christmas.  They want motors with those wheeled somethings.  This can get expensive.

Out comes my husbands and my creativity (we are both blessed with overactive imaginative creative minds) and everybody ends up happy with Christmas.  Sharing…the go-cart, the re-vamped, re-painted bicycles,  the things with motors and wheels that have been made from salvaged parts from various other things with motors and wheels ( my husband has an endless stock pile of these parts) !!!  I am certain, had my husband and I not had that depression generation frugal upbringing,  our creative minds would not have been unleashed and our appreciation for what we had or created ourselves would not have been nurtured.  Our children would not have learned  through us the value of sharing and being grateful for what life (or Santa) delivered.  The knowledge that we were not entitled but got out of life what we put into it through hard work and caring for one another.  Sharing with one another.

From generation to generation we pass these ways of living on.  Whether its finding ways to re-make something, to fix what’s broken instead of throwing it away, to be self sufficient and GRATEFUL for what we have.  To share, to care.   For our ability to do these things and to pass this on to our children and our grandchildren and so on down the years.

That Christmas  I was nine I did learn something quite valuable.  It took me many years to understand it.  I learned there was a secret ingredient in my childhood that really isn’t so secret after all.  My parents struggled to give me and my sisters the very best they could in the material sense.   Money was always tight.  Yet their love was limitless and flowed freely.  Their lessons in sharing, being thankful for what we had,  finding ways to make something good or GREAT out of nothing, GIVING to someone less fortunate when there really wasn’t much to give but a hug or a kind word were the things money couldn’t buy and one didn’t, doesn’t, need money to buy them today.

Yes.  We need money to live.  We need to be fed, warm, sheltered, get to work one way or the other in expensive cars, on trains, planes or bicycles …  all of this costs money.  The devastation from these wildfires and hurricanes and other natural or human caused horrors is going to cost massive amounts of money.

I cannot fathom how we can pull from our souls any form or feeling of gratefulness for such loss.  How to share when it feels like we have nothing to begin with.    Like a nine year old mind trying to grasp how someone as saintly and splendid as Santa can be so unfair, so disappointing, so unkind.  Its unbelievable…we feel nothing but despair…disappointment, disillusionment.

Life IS good.  We will find  goodness  if we look for it.  We can and will go forward with hope and with the tools of gratitude for our many blessings and  love for our fellow man.  By giving what we can when and where we can.  Its that simple and its free.  If we employ these tools through helping each other, each and every one of us in our own way, we can start a flow like a tsunami over the planet.  A grace through giving that can spread as powerfully as a wildfire out of control.

And every nine year old, at that tender, impressionable age, will come to understand that life isn’t about what you receive or what you think you deserve.  Its about what you give, how you look at what you have, and how very blessed we all are in so many ways.

So if all you can do is give a prayer DO so.  If you don’t pray then at the very least put a dollar (or ten) in the relief fund at your local market.  If you can’t afford to part with money a hug is free and your neighbor might need one.  It might have been her son and his family that lost their home.  All of this means something to someone and like a ripple on the water it has the potential and strength to reach the opposite shore where life seems very unfair.  It can make all the difference.

Many Blessings…


Scrumptious Scalloped Tomatoes (quite unlike mushy peas)

For years my husband and I have traveled to Cape Cod.   Many of those years were in a van full of our boys and one or two of their friends.  Bags and boxes of food (we couldn’t afford to take all of those stomachs on legs out for dinner) filled every inch of that van along with all the personal belongings we needed for a week away from home.  As many bicycles as there were people were racked either on top of the van or on the back of it.  We really did look like a pack of gypsies !!!

Occasionally in those years Bill and I would get the opportunity to travel there together.  No kids, no bags of food.  Just the two of us.  When that happened, and as it still happens now,  I don’t cook.  We eat out.  Fresh seafood is heaven on earth and we typically eat as much as our bellies can hold in one sitting.  There are some fabulous restaurants on the Cape.  We have some favorites for sure.

One of those, which is no longer there, was in Hyannis.  Bill and I would typically stop there on our way out to the Cape but occasionally we would time our trip home to include dinner there.  The place was hidden off the beaten path and from the outside it really didn’t appear to be a restaurant.  The sign was barely visible and the first time we went we blew right on by.  A dirt parking lot that was full of cars was our final clue.  In we went…and back we went quite a few times through the years.

Always on the menu along with fresh, fabulous seafood, was a simple dish of scalloped tomatoes.  I remember looking at that offering on the menu thinking…ewwwwwwwwww…not something I would order.  I’d never had them and wasn’t interested really, in ordering a side dish of something that didn’t seem appealing.  Not when I could gorge on fresh seafood.  Why take up space on something that sounded so like mushy peas?!?  Well, as it happens, good things happen when you least expect them.  The fresh haddock I ordered that night came with a side of those scalloped tomatoes.

Now, as a kid in the house I grew up in there was a dinner time rule that I could easily have lived without.  My sisters and I, without fail, whether home or out to dinner, HAD to try a teaspoon full of that mass of goo on the plate in front of us which we were sure was a gob of poison that was going to kill us.  Old miseries die hard.  I couldn’t bring myself to NOT TRY A TEASPOON FULL of those scalloped tomatoes.  Thank goodness for those ingrained tortures of childhood.  You know…the ones that “are good for you because I say so”.

I ordered a side of those scalloped tomatoes EVERY time thereafter at that restaurant.  Occasionally (and when this happened I really wanted to go sit in the car and have a good cry) the waitress would announce they were out of them for the evening.  Sooooooooooo not fair…

As was the sad day Bill and I stopped there for dinner on our way to the outer Cape, mouths watering in anticipation, only to find a sign in front of the restaurant stating they had closed.  As in CLOSED.   For GOOD.  This time I DID sit in the car and cry.    I think this one one of the few times I cooked at the Cape.  (Bill and I are blessed beyond belief to have family places to stay out there so I do have  kitchens handy in which to fry up the occasional egg…they are mostly used for making coffee in the morning and pouring wine later in the day.)   We stopped in at the local Stop and Shop in Orleans and I bought what I thought would be the right ingredients for this dish and tried making it myself the very next day.

I had gotten canned stewed tomatoes since I knew the tomatoes available in the store wouldn’t be ripe enough to peel.  These days, I use only fresh tomatoes.  I wait for them to be perfectly ripe after sitting on the counter for a few days (do NOT put tomatoes in the refrigerator…they won’t ripen and they will taste fake.  I mean, FAKE…something about refrigerating them makes them just…well…awful).  If you are desperate to try this dish and don’t want to wait for counter ripened tomatoes by all means get some canned stewed tomatoes.  The dish will be delicious but fresh tomatoes make it SCRUMPTIOUS.

I have a favorite place to shop for fresh, incredibly delicious and sometimes difficult to find ingredients and for anyone who lives here in the Berkshires of Massachusetts, Guido’s Fresh Marketplace is  the  place to go for fresh ingredients.  They have a store in Pittsfield…literally on the Lenox line and another smaller store in Great Barrington, not far from the CT line.  Both are on Rt. 7 as you travel through the Berkshires.  If you are just visiting I highly recommend stopping in.  If you live here…and haven’t been…all I can ask is WHY on earth NOT?

Anyone looking for organic, natural food and ingredients, personal items, wine, you name it, Guido’s can provide.  If they don’t have it always ask.  I’ve done that for years and EVERYONE there is happy to help.  They have ordered things for me and always come through.  I would rather pay a few dollars more for healthy alternatives than be visiting my medical professionals for health issues related to what goes into or on my body.  (And NO…Guido’s did not ask me to mention them…tho I did ask their permission.  I simply and truly believe that we get back what we put into everything in life and having them in my back yard -so to speak- is something worthwhile to my well being).  Yes.  I willingly admit I’m a  “GOOD FOOD”  snob.

So, here is my recipe for scalloped tomatoes.  My mom told me today that her mom used to make them.  It was one of her (my mom’s) favorite dishes.  Wow…apples don’t fall far from the tree as it turns out.

SCALLOPED TOMATOES with Parmesan Crouton’s

3 or 4 large very ripe tomatoes cored, peeled and sliced into 1/2 inch slices.

2 or 3 large cloves of roasted garlic and all the little cloves in the middle ! (I do this ahead of time.)

2 TB extra virgin olive oil

1 ball of FRESH mozzarella – enough to give you 8 or 10 slices

1 TB BUTTER

1/4 cup grated Parmesan cheese

freshly ground salt and pepper

1/2 cup fresh basil julienne ‘d and  two sprigs of fresh thyme leaves rubbed off the stem.

For the Parmesan Crouton’s :

Two or three slices of bread sliced into 1/2 inch chunks.  (approximately 1 1/2 cups) I save the ends of my homemade bread (there is that snob in me again).  These work beautifully.

1 TB extra virgin olive oil

1 TB grated Parmesan cheese

a few grinds of freshly ground  salt and pepper

Core, peel and slice the tomatoes.  Rub 2 or 3 of the larger roasted garlic cloves on the inside of a casserole dish.  Place a few of the tomato slices in the dish evenly spread and evenly add a bit of the basil and thyme.  Now add half of the slices of mozzarella and half of the grated Parmesan. Thinly slice the butter and place evenly over this layer.  Add the rest of the tomatoes, basil and thyme.  Top off  with the remaining mozzarella slices and the remaining Parmesan.  Squeeze the remaining small roasted garlic cloves on top evenly.   Drizzle the olive oil on top of that.  Then add  freshly ground salt and pepper to taste.  I should mention that I use freshly ground green pepper and Himalayan Pink Salt.

Place the dish, lightly covered,  in a 375 degree oven. Bake for about 30 minutes or until  bubbly.

Now for the crouton’s:

Slice the bread into into half inch square chunks.  Place the chunks on a baking pan and drizzle with the olive oil.  Add salt and pepper to taste and using a spatula or your fingers mix them around on the pan to evenly coat.  Bake them in the same oven as the scalloped tomatoes until they are beginning to brown.  About 12 to 15 minutes.  Remove from the oven, mix them around again (this time with a spatula…they will be HOT) sprinkle with the Parmesan cheese and place them back in the oven until they turn a deep golden brown.  Perhaps another 8 minutes or so.  Remove from the oven and let cool.

When the scalloped tomatoes are bubbling take them out of the oven, cover them with the golden brown Parmesan crouton’s, and carefully press the crouton’s down a bit into the bubbling, cheesy, tomato mixture so they will absorb some of that luscious tomato juice.   Put the dish back in the oven, uncovered, and bake for another 10 minutes or so until the crouton’s are looking delectably crisp and the tomato mixture is bubbling.  Remove from the oven and let the dish sit for about 15 minutes before serving.

Gather around the table, light the candles, pour some wine into those waiting glasses and enjoy every last bite.  The fresh tomatoes from summer are not going to last much longer.  The basil in the garden is looking  cold and sad.  But with good places to buy fresh ingredients this dish can be enjoyed year round.  How delicious is that?

Tools of the Trade

How many times have you rummaged through your kitchen drawers looking for that gizmo that is supposed to do what it claims to do?   You finally find it under 79 other gizmos (some of which have been piling up there until you have no idea anymore WHAT it is THEY claim to do ) only to discover this wonder gizmo does a really crappy job.  You’ve wasted all this time with this gizmo and now the butter in the pan on the stove has not only browned…its black.  Into the trash it goes.  Next time just burn five dollars.  The house won’t stink of burned butter.

Such a waste.  Of precious time.  Of energy. Of your sanity.  Of very expensive butter.

There is a lot of truth to all the advice these days to organize, simplify, purge.  It makes sense and it saves us from enormous amounts of stress that seems to be rampant in our busy lives these days.  Some people thrive on busy. In fact business seems to be epidemic in our society.   I’m not one of those people who thrive on busy.

When I spend time in my kitchen, in my home, creating, I like the tools of my trade to be not only THE ONES that work the very best for ME  but they MUST be THE ONES that make me feel  we are the very BEST of FRIENDS.  Like I can’t survive without them.  They need to be comfortable, reliable, honest about what they claim to do and maybe even more at home in my kitchen than I am.   I in return am always taking them out and spending quality time with them.  They aren’t spending years in dark drawers or cabinets wondering when it will be their turn to travel the kitchen with me.  And when I open the drawer or cabinet there they are.  Right in front of me.

So here is today’s “recipe”.

Set aside a reasonable amount of time (hint…if you can’t open an upper cabinet without a major landslide you will need more time) to go through your kitchen looking for these friends, sorting them and replacing them in the spots where they will work best for you.  These will be the keepers.

Do not try to do this all in one day unless your kitchen is the size of a matchbox.

Prep a work area close by…counter top, table, floor even.  Have a large trash can, several empty cardboard boxes of various sizes,  your determination and a measure of ruthlessness handy.  You will need these.

Keep in mind as you go one drawer or cabinet at a time what it is you eat, how often you eat certain things and how and where in your kitchen you like to prepare your meals.  How far do you want to travel  (think down to the basement for the turkey roaster you use twice a year) for the salad spinner you use daily?  All of these details matter and can save a huge amount of time and energy.

Now…on your mark, get set GO.

As you begin, immediately set aside the things you use all the time and absolutely can’t live without.  You’ll go back to those later.    Then, one item at a time (but don’t take too much time here) look at what it is, what it does or doesn’t do and if within 30 seconds it doesn’t speak to you in a friendly keeper way, put it either in the trash (most certainly if its broken) or one of the boxes suited to its size.  Don’t waste ANY time on it if you’ve never used it or if you don’t want it.  Decide which vessel it goes into, box or trash and deliver it there instantly.

In the amount of time you have set aside for yourself to do this go through as many drawers and cabinets as you can.  If you are doing this in timed increments keep in mind that you might not be able to put an item where you eventually want it to be since those spots are still bulging at the seams until you get there.  Don’t panic.  Just go one item at a time.

Notice I am posting this on a Friday.  The weekend is coming.  Maybe you will have a bit more time.  Perhaps not.  Either way I guarantee as soon as you begin you will want to finish.  You will feel so much better.  As a bonus you can share all of the boxes of gizmos, gadgets and whatsits that you have filled by donating them all to a local shelter, the Veteran’s,   or someone you know who is just starting out on their own.  You have a lot of options to share but please keep in mind as you go…if its broken or so badly beat up its unrecognizable it really should go in the trash.  No one wants junk.


Pictured here are a few of my favorite tools in my kitchen.  You decide for yourself which of the items you have suit you best for your kitchen.  I’ve spent years trying all sorts of gadgets (I worked in a  Gourmet Kitchen shop for many years and got a lot of experience trying out a lot of whatsits) and I know what works best for me.  Its all down to individual preference.

Do not let anyone sway you on certain things.  Your knives for instance.  They need to fit your hand like a glove and be SHARP.  And I mean SHARP.  In order to be safe.  Ironic I know, but a dull knife is an accident waiting to happen and has the potential to ruin your day for many days until the stitches come out.

I’m straying…so…continue from cabinet to cabinet, drawer to drawer until you are satisfied that the items you have in your absolutely cannot live without pile are all there.  And that all the rest are either in the trash or a box to give away.  Even if this means (after you’ve run out of time for this round) that there is a bit of clutter lying around the kitchen.   Don’t despair.  You are so close to putting those absolutely cannot live without items in their place.

It may take a few days, it may take a month.  But do yourself a favor and don’t let too much time go by.  After all the boxes have been delivered and the trash has been put on the curb, put your kitchen in order as to how it will work best for YOU.  Then, sit back with your family, around the table, and marvel at how little time it took to create a scrumptious, palate pleasing, relaxing dinner.  Because you had everything you needed right where it needed to be at the moment you needed it most.

The butter didn’t burn.  The house smells like dinner is gonna be awesome.


Just Send Cookies.

Many moons ago, my second born son Andrew signed up for the Marine Corps.  The recruiter came by to take him away shortly after dinner on the day of Andrew’s 18th birthday.  We had just finished his requested birthday dinner of BLT’s (surprise) and to this day I marvel at Andrew’s ability to eat three (or was it 4?) of those sandwiches, washing them down with a half gallon of milk (no kidding…we went through roughly 12 gallons of milk a week at our house in those days) while I sat there next to him at the table and tried to keep a stiff upper lip and swallow half my sandwich.  The lump in my throat was so massive and  intrusive I could hardly breathe.

Alas, the moment came when Andrew loaded himself into the van and the recruiter drove him away.  BUT…not before I asked Andrew what I should send once he forwarded his address for boot camp.

“Mom.  Just send cookies”.  “Please.  Just send cookies”.  His first letter came within a week with his new address and another request for “just cookies”.  So.  Cookies it was.  Boxes and boxes of cookies.

To give you an idea of how many cookies (Christmas cookies not included) I’ve made over the years you need to know I have raised three boys and another that became part of our family through the heart.  Between my husband and me we have his son Bruce,  my two boys Matthew and Andrew and our “adopted through the heart son Chad.  Chad isn’t a big one for sweets so his consumption of cookies isn’t big.  My potato salad and sandwiches however…well…another day I’ll share that!

Through the years of raising these stomachs on long hollow legs we also came to enjoy a house full of their friends who also  sported stomachs on long hollow legs!  It felt a bit like the old Yogi Bear cartoon where the aroma from the pies cooling on the open windowsill attracted  all the hungry bears for miles and miles and miles !!!  Our kitchen door got a LOT of exercise.

Now, I also need to mention that our three boys were boy scouts.  I made cookies for a scout meeting one night…I think you can guess that it wasn’t destined to be a one time thing.  Two of these boys went on to become Eagle Scouts so I had years to get this recipe right and the scouts never complained about being guinea pigs.

Ok.  So now jump to husband Bill.  The original cookie monster.  My biggest fan but now he HAS to share “HIS” cookie jar with our 7 grandchildren.  They are much cuter with smaller stomachs than a mob of adolescent boy scouts !!!

A few years ago Bill and I sold the house we raised our family in and built a new house here on top of a hill in the woods.  It meant that Bill would have roughly a 50 minute drive to work every day.  I worried about that for him.  My biggest fan, Bill said to me “if you keep that cookie jar full of those cookies for my lunch every day it will make the drive there and home seem like nothing”.  How on earth could I argue with that.

So readers, here is my cookie recipe.  Tweaked over the many years I’ve had to practice creating them.  It appears to be a favorite tho not being a cookie monster myself I don’t fully see the attraction…but there must be something to them since the cookie jar gets exercised by everyone who comes to our house.  Andrew, many years ago,  said it was “the secret ingredient mom…you put it in everything you do”.   LOVE.   I wouldn’t have it any other way.

The Secret Ingredient Chocolate  Chip Cookies

In a mixing bowl cream together till well blended:

1 cup of room temperature BUTTER.

2 TB coconut oil

1 TB honey

3/4 cup light brown sugar ( I use Florida Organic Sugars)

1/4 cup white sugar

Add 2 teas. PURE vanilla extract and 2 eggs and blend until light and fluffy.

Now preheat  your oven to 375 degrees.

Next add to the mixing bowl:

2 3/4 cups of quick oats

2 cups unbleached all purpose flour

1 teas. salt

1 teas. baking soda

1 1/2 cups rough chopped walnuts or pecans

1 12 oz. bag of dark chocolate chips.  (think Hershey’s kitchen special dark chocolate chips)

Mix all the dry ingredients into the wet ingredients until everything is well mixed.  Line a cookie sheet with parchment paper.  Using a small cookie scoop put the dough on your cookie sheet spacing the dough roughly 2 ” apart.  I can get 20 cookies on my sheets.  Bake them in your 375 degree oven for 14 minutes.

Remove from the oven and wait about a minute before removing the cookies from sheet to a cooling rack.  Let them cool completely before eating half of them and putting the rest in your cookie jar.  If cookie monsters are present you might be out of luck with this batch…none will make it to the cookie jar !!!

I honestly couldn’t say how long these “store” for since the jar empties fairly quickly.  I do know they freeze well.  I typically make a batch a week now since Bill is my only resident cookie monster.

One batch makes roughly 30 cookies.

ENJOY to the fullest measure and don’t forget to inhale the aroma of these cookies as they bake.  Just don’t put them on an open windowsill.  There might be bears around !!!


Facebook Greetings

Hello to all my Facebook friends and family.

I welcome you to my Blog, The Soul of the Secret Ingredient.

And, I thank you for all the support and encouragement you have given me to pursue this dream.

Thank you for sharing.

Many Blessings To You Always

MANY BLESSINGS and HOPE For Tomorrow

Good rainy morning.  The hurricane season is hammering away on the east coast and  wildfires are devastating  parts of the west coast.  Its raining hard here this morning and I wish with all my heart we could shift the rain out to those wildfires and quench them.  

Life has to feel like its moving very slowly through a nightmare for the people who have to endure these horrible events.  The recovery will take years.  Not just the physical aspect but the emotional one as well.  I simply ask that we all take a few moments out of our VERY fortunate lives to send positive thoughts and prayers to these hard hit areas of our country and to these people in great need , our fellow men, women and children,  who with the Grace of the World and  help from all of us in what ever way we can give, will soon be in a better place in their lives.  

MANY Blessings,

Sara

“Gourmet” BLT’s…


School has started in many states across the country.  Summer is winding down, but not yet gone.  The temperature typically drops at night now as fall approaches yet can still soar into the 80’s during the day.

I remember being so excited to wear my new school outfit on the first day back.  By the end of the day I was wishing I was still in shorts and a t shirt.  So it goes…

Moms and Dads who work full time are probably scrambling to figure out the new fall schedules and one or both of them are thinking at some moment during the day  ” what do we do for dinner tonight” ?  Even those who don’t have to make that decision are probably looking for an easier way to transition to new school schedules and how to juggle the after school activities with homework, dinner and a relatively sane bedtime.

Now might be a good time to go to the easier versions of dinner to give everyone a chance to acclimate .  This “gourmet” blt idea came to me AFTER our children left home but it sure is handy for me after a day of running around and it provides the basic “meat, veggie, fruit, dairy” satisfaction between two slices of bread.  Add some steamed green beans or something as simple as carrot sticks with hummus and you’ve got a meal to get you through at least one dinner.

Its extra good IF there are leftover sandwiches.   They are fantastic for lunch the next day.  Prep them the same way just leave the tomato aside in a separate container to add just before you eat them.  Otherwise they get very soggy.

I don’t know many people who don’t like bacon.  Or tomato’s, lettuce, apples and some good mayo between two fairly substantial slices of bread (not toasted is okay…lightly toasted is better).  And of course cheese.  Cheddar is my favorite but pick your own favorite and the easiest dinner is on the table in a short amount of time.  Probably before you figure out the new math that looms on the kitchen table in front of your student who is as mystified about it as you are.

First step.  Cook your bacon.  In a 375 degree oven. (I use Boars Head . I like as close to unprocessed as I can get in EVERYTHING I use for food )…use what you like best.   Bake to the crispness of your liking.  When it is done, put the cooked slices on paper towels and pat off some of the excess bacon grease.  Set off to one side.

While the bacon cooks get your greens ready.  There must be some lettuce in the garden still or maybe you have some in the fridge from the farm stand down the road.  Get it out, give it a wash, pat it dry and have it handy.  If you don’t have any lettuce, you can use cucumber slices. It adds the green factor and is good in a pinch.  For cucumber lovers…this is a plus.

Now, get those over ripe tomato’s off the counter and rinse them off.  Peel them if you want (I do…it makes eating this mega sandwich easier) but be sure to slice them into hefty 1/2 inch slices.  Set them aside with the lettuce.

Now, if the bacon is still doing its thing in the oven, wash, and core your favorite kind of apple.  Something like Honeycrisp or Ginger Gold.  Just a nice crunchy apple.  Slice this apple into slices as thin as you can.  Use an uber sharp knife.  It does work best for those thin slices which make all the difference  .

If you are toasting your bread for these sandwiches I have found the best way to get it lightly toasted is to put it in the turned OFF oven after you remove the cooked bacon.  This way you can get a few sandwiches done rather than one at a time if you use a conventional toaster.  Put as many slices as you need on a cookie sheet and pop the sheet  in the oven.  Keeping an eye on it take it out of the oven when it is toasted to your liking.  If you ARE using cheese in these sandwiches, put the cheese slices (or the grated cheese) on one slice of the bread for each sandwich and put the pan back in the oven to melt the cheese).

Get out the mayo.  I use Hellman’s…I swear by it and a really good mayo makes all the difference in anything you need to use mayo for.  Spread a generous amount on both slices of  the bread for each sandwich.  On top of the mayo on each slice put a good amount of lettuce.  On top of the lettuce on one slice put two or three of your tomato slices (depending on the size of the bread slices).  Now, add your bacon.  At least two slices per sandwich.  More is really GOOD!  Place the sliced apple on the other piece of bread on top of the lettuce.  Put the slices of loaded bread together, slice them in half or leave them whole.  Your call.  Put them on a platter and yell…”dinner”.

Now,  lets get these babies on the table!!!  Get rid of the homework…its time to share dinner with your family.  Around the table.  With lots of napkins or paper towels…these sandwiches can get messy in the best possible way.  Enjoy every last bite!

And don’t forget to listen to the crickets through the still open windows.   Its that time of year again…